Customize Ubuntu 20 LTS Desktop
There are many flavors of Linux that do great and look great. My personal preference has been to stick with Ubuntu and the Gnome desktop. What confused me in the beginning is that you can have Ubuntu with a different "desktop". When you think of macOS or Windows they all look the same; this isn't the case with Linux!
Table of Contents
Customize with Gnome Tweak Tool
First thing you'll want is the gnome tweak tool. This allows you to add Gnome Extensions that can do anything with your desktop. Let's install the tweak tool and the Chrome Gnome Shell.
sudo apt install -y gnome-tweak-tool chrome-gnome-shell
Make sure to grab this Chrome extension: Chrome Gnome Shell so we can add extensions right from chrome.
Great Extensions
Dash To Panel is my all time favorite extension. It allows you to customize your top bar (or any bar) nearly any way you like.
If you aren't a fan of the Dash to Panel the other popular extension is Dash to Dock which is more similar to the default Ubuntu Sidebar but a lot better.
Screenshot Tool puts an icon in your task tray by the clock and you can easily capture the screen, window or area with two clicks.
User Themes is another awesome extension that allows you to change the look and feel of your desktop. You can head over to GnomeLook.org and find Gnome Shell Themes, Icon Sets, Cursors, Docks and a whole lot more.
Tweak Tool, Icon Packs and Themes
A few example themes and Shell Themes, Icon Packs and Themes are below.
- Theme: Yaru Colors
- Theme: Orchis GTK Theme
- Icons: Fluent Icon Theme
- Icons: Monday Icon Theme
Where to Put Theme Files
There are two places you can place your theme files. The first is your local user area so it will only be accessible to you. Or you can put it in the global user shared folder.
For you only, or your username, place everything in your $HOME/.icons. You likely cannot see a dotfile file or folder by default so you can either load Nautilus (File Explorer) and click the three-dot menu to Show Hidden Files. You can press CTRL+L in Nautilus and type ~/.icons to navigate to it. Or you can simply use the terminal and navigate to cd ~/.icons.
mkdir ~/.icons
cd ~/.icons/
# Unzip/Untar your downloads here
For any user on your machine place it in the common area of /usr/share/icons. Each Icon, Cursor or Theme has it's own folder. They also have an index.theme file within them.
tar -zxvf your-theme-download.tar.gz
sudo mv your-theme-folder /usr/share/icons/
If you go further on reading and use a PPA rather than a manual install below, you'll notice that /usr/share/icons has installed those repositories to this path.
Popular Icon Packs
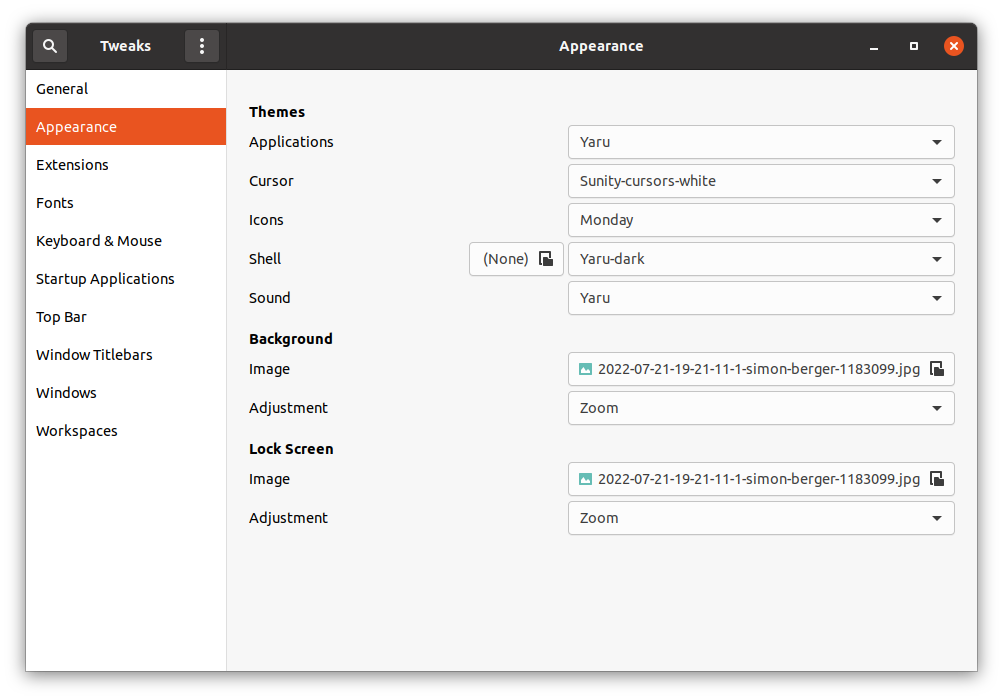
In Tweak UI, to get to it press Super/WinKey and search for Tweak. From there go to the Appearance Tab. This is where you'll set your cursor, icons, and shell theme if you like. It's also where you can adjust your Gnome Extensions.
These PPA installations will appear in your Tweak menu automatically. You may to to reload it if you have it open when you install something new.
Paper
Paper may be the oldest in the collection but it's still beautiful and still used by many. This, like the next three, uses a PPA to install them as they are updated more frequently.
sudo add-apt-repository -u ppa:snwh/ppa
sudo apt install paper-icon-theme -y
![]()
Numix
Numix seems like it has been the most popular for a long time. It also include Shell Themes and a large variety of icon styles.
sudo add-apt-repository ppa:numix/ppa
sudo apt install numix-*
![]()
Papirus
Papirus is a long time favorite by many with a massive collection of icons.
sudo add-apt-repository ppa:papirus/papirus
sudo apt-get install papirus-icon-theme -y
![]()
You can do hunting for your style on your own so that's enough of that let's move on.
Terminal
In my opinion Gnome Terminator is the best terminal. It does everything I've ever needed and it's far better than the default Ubuntu terminal.
If you want to set this as your default Terminal, run this command and select your favorite. You can always install different terminals also.
sudo update-alternatives --config x-terminal-emulator
Others swear by Oh My ZSH, which is a decked-out terminal with a ton of add-ons. You just have to be careful not to go crazy or you'll notice a very laggy terminal.
SSH Management
If you are unaware of SSH you can skip this part. SSH Keys are used for server authentication among other things. At some point you will want one or many. It's very important to keep your secret key private. You'll see more under "Creating an SSH Key".
SSH Key Location and Permissions
Quick SSH Permission Cheat Sheet
| File | Permission | Command |
|---|---|---|
~/.ssh | 700 | chmod 700 ~/.ssh |
~/.ssh/keyname_rsa | 600 | chmod 600 ~/.ssh/keyname_rsa |
~/.ssh/keyname_rsa.pub | 644 | chmod 644 ~/.ssh/*.pub |
~/.ssh/authorized_keys | 644 | chmod 644 ~/.ssh/authorized_keys |
Note: An environment variable appears as
$NAME; there are many pre-defined ones in Linux to save you from having to know an absolute value.echo $HOMEwould provide you the current user's home directory.echo $USERis another one that's very common.
Tip: You can also reference the current user's home folder with
~/.sshrather than$HOMEif you like.
Permissions: SSH Folder
Create a folder in your Home Directory called .ssh. Your SSH key files are stored here.
mkdir $HOME/.ssh && cd $HOME/.ssh && chmod 700 $HOME/.ssh
chmod -R 700 $HOME/.ssh
Permissions: Authorized_Keys
Authorized Keys are usually on a server which allow you to SSH into, they contain your .pub key. Let's ensure we create a file if one does not exist. You can run this one-liner in the terminal.
[ ! -f $HOME/.ssh/authorized_keys ] && (touch $HOME/.ssh/authorized_keys && chmod 644 $HOME/.ssh/authorized_keys)
Create: SSH Key
Your SSH key works as follows:
- Never share your private key, this has no extension.
- Use your public key for any services you please, this has a
.pubextension.
Recommended: Create this within your
~/.ssh/folder.
# Change your_keyname to something like john_rsa
ssh-keygen -t rsa -b 4096 -f your_keyname_rsa
You do not have to suffix '_rsa' to your key; I do it to remember the encryption type. You can provide a password when prompted every time you use the key to add another layer of security or just leave it empty to not require one.
Permissions: SSH Keys
Let's apply permissions of the private key to all things, and just adjust the public keys to the other in two commands.
chmod -R 600 $HOME/.ssh/
chmod -R 644 $HOME/.ssh/*.pub
Add: SSH Key to SSH-Agent
You SSH Key will not always be added to the SSH-Agent. You may need to add your private key to the agent. To do this simply run:
# This is pointing to your private key
ssh-add $HOME/.ssh/your_key_rsa
If you get an error, here are two resolutions:
- Ensure your permissions are correct (See above)
- Re-instantiate the agent with
eval $(ssh-agent), you should see something likeAgent pid 1234.
Extreme Mouse/Touchpad/Keyboard Tweaking
You would use xinput to adjust any setting available to these hardware devices. Here's my output after running xinput --list.
⎡ Virtual core pointer                    	id=2	[master pointer  (3)]
⎜   ↳ Virtual core XTEST pointer              	id=4	[slave  pointer  (2)]
⎜   ↳ Raydium Corporation Raydium Touch System	id=9	[slave  pointer  (2)]
⎜   ↳ Logitech M325                           	id=10	[slave  pointer  (2)]
⎜   ↳ Logitech MX Master                      	id=11	[slave  pointer  (2)]
⎜   ↳ Elan Touchpad                           	id=13	[slave  pointer  (2)]
⎜   ↳ Elan TrackPoint                         	id=14	[slave  pointer  (2)]
⎣ Virtual core keyboard                   	id=3	[master keyboard (2)]
    ↳ Virtual core XTEST keyboard             	id=5	[slave  keyboard (3)]
    ↳ Power Button                            	id=6	[slave  keyboard (3)]
    ↳ Video Bus                               	id=7	[slave  keyboard (3)]
    ↳ Sleep Button                            	id=8	[slave  keyboard (3)]
    ↳ Integrated Camera: Integrated C         	id=12	[slave  keyboard (3)]
    ↳ AT Translated Set 2 keyboard            	id=15	[slave  keyboard (3)]
    ↳ ThinkPad Extra Buttons                  	id=16	[slave  keyboard (3)]
    ↳ Logitech MX Master                      	id=17	[slave  keyboard (3)]
In order to see all the properties I can select by name or by ID. It's obviously easier to select my ID and much shorter. xinput --list-props 13 for my touchpad.
xinput --list-props 13
Device 'Elan Touchpad':
  # ... Shortened for brevity
	Synaptics Middle Button Timeout (353):	0
	Synaptics Two-Finger Pressure (354):	282
	Synaptics Two-Finger Width (355):	7
	Synaptics Scrolling Distance (356):	71, 71
	Synaptics Edge Scrolling (357):	0, 0, 0
	Synaptics Two-Finger Scrolling (358):	1, 1
	Synaptics Move Speed (359):	1.000000, 1.750000, 0.055741, 0.000000
You can set your property by using the ID (or string) fro the device and the property name, it might look something like this:
xinput --set-prop 13 "Synaptics Palm Detection" 1
Disable Touchpad When Typing
If you use a ThinkPad on Ubuntu after a while this might annoy you. To fix this I disable the touchpad for about 1 second when typing.
- Important: in Tweak Tools > Keyboard and Mouse, make sure to disable the setting "Disable while Typing" it's no good.
- Temporarily stop the the syndaemon process
sudo killall syndaemon - Start syndaemon with the settings you prefer, also try
syndaemon --help - You can try a setting, see if you like it, if not kill the service and start it again with different settings:
syndaemon -i 1 -d -K, the 1 is for seconds.- In my Startup Applications I added an entry with
syndaemon -i 1 -d -Kas the command so it's always enabled.
- In my Startup Applications I added an entry with
Hardware Commands & Tools
Run these in your terminal.
| Command | Description |
|---|---|
df | Disk Freespace |
fdisk | View/Modify HDD Info (Advanced) |
free | View free Memory |
hwinfo | (Must Install) General HW Info |
lsblk | List Block Devices (Partitions, Storage Devices) |
lscpu | CPU Info |
lshw | List Hardware |
lspci | List PCI |
lssci | (Must Install) List SCSI (HDD/DVD) |
lsusb | List USB |
mount | View/Modify mounted filesystems |
Remove Unwanted PPA Packages
Too many Source Lists can slow your system upgrades, you should clean out things you never use once and a while. This is when you run apt-get update. To see all your repositories:
ls /etc/apt/sources.list.d/
And to remove, you simply do a rm
sudo rm /etc/apt/sources.list.d/package_i_dont_want.list
sudo apt-get update
I hope some of these posts are helpful, enjoy Linux!